How to clean a PC: shut Windows down, unplug the power cord, hold the case power button for fifteen seconds to drain residual board power, then ground yourself and work through the machine in one pass, filters first, then intake, fans, heatsinks and board surfaces, using an electronics duster and pinning every fan blade before air reaches it. Nothing inside a desktop needs liquid, nothing needs a shop compressor, and the power supply never gets opened.
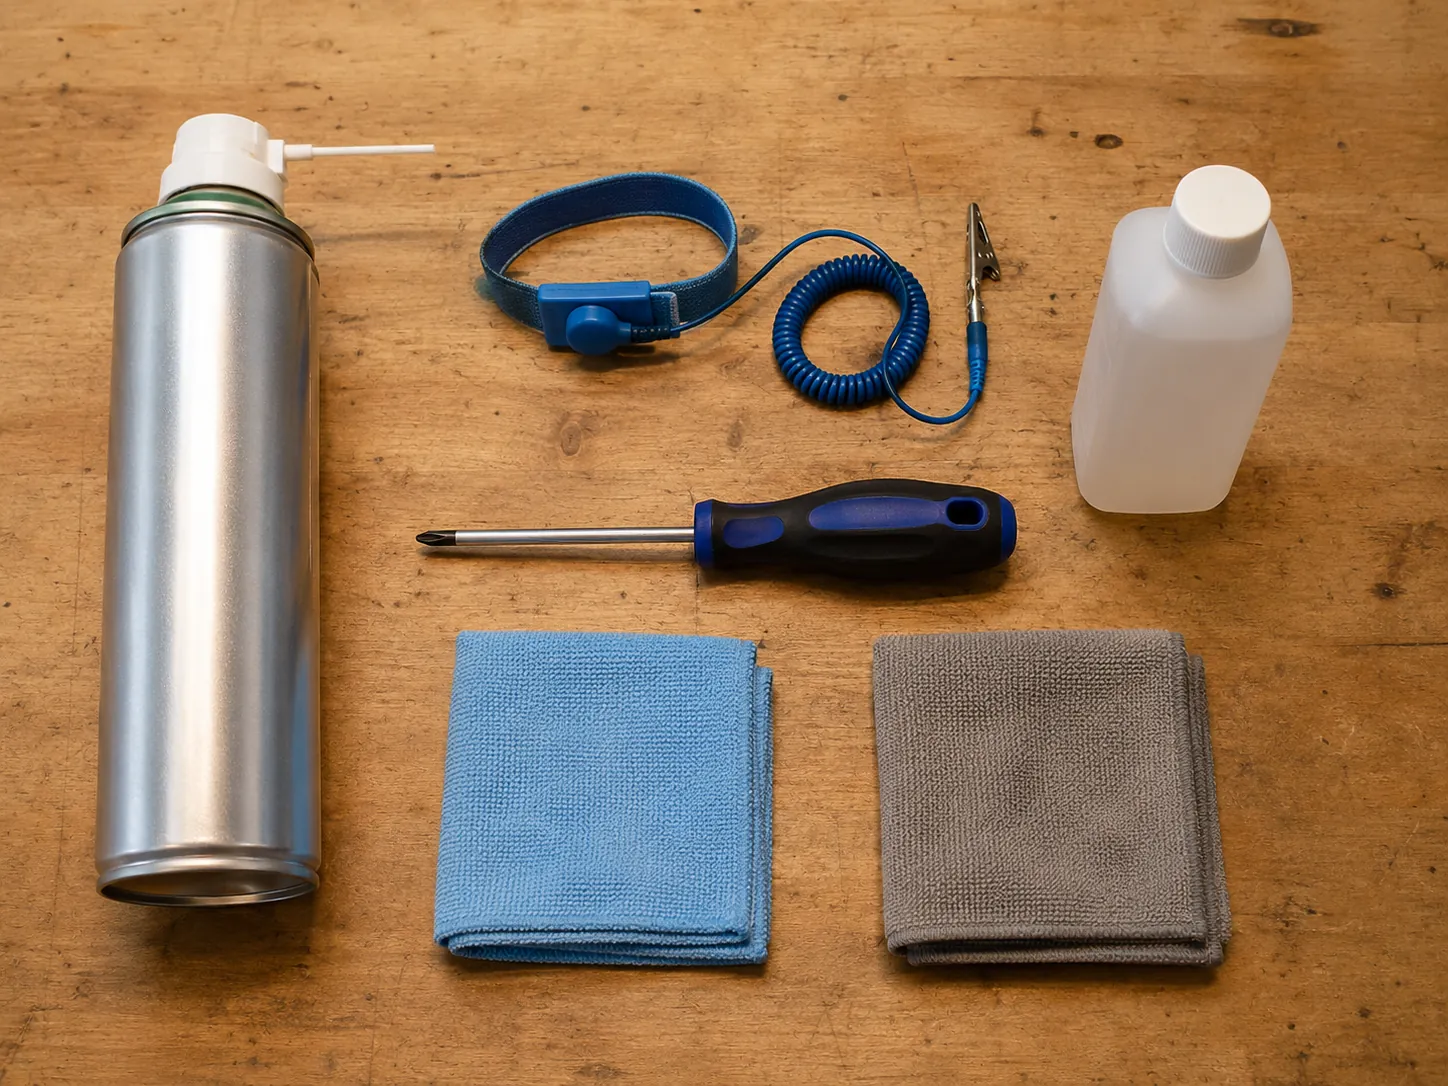
Below is a full list of supplies needed to clean your own PC.
The buying decisions that actually matter are the duster and the wrist strap. Everything else on this list you probably own.
| Item | Spec / Notes |
|---|---|
| Canned electronics duster | An electronics-labelled duster with a straw. Falcon's Dust-Off label specifies a 3 to 4 inch standoff and 2 to 3 second bursts, can held upright. A 10 oz can runs about $10, or roughly $5 a can in a twelve pack, as of August 2026. Ignore any "PSI" printed on the can; that is tank pressure, not what reaches the component. |
| Electric duster (optional) | Pays for itself if you clean several machines a year. Consumer units start near $30; the corded MetroVac DataVac is about $126 as of August 2026. Pick one with variable output. More power is not better, and ASUS warns that excessive airflow damages fan blades. |
| Wired ESD wrist strap | Wired, with a real alligator clip. Service straps carry a 1 megohm resistor and run $8 to $10. Do not buy a "wireless anti-static wristband", Dell's service documentation rejects them outright. |
| #2 Phillips screwdriver | One that fits properly. An undersized driver cams out and chews the screw head. |
| Two microfiber cloths | One dry, one for damp work. Not paper towel. |
| 70% isopropyl alcohol | Exterior surfaces only, about $4 for 16 oz. ASUS and Dell both specify 70 to 75 percent for supported outer surfaces. Higher is not automatically safer, coatings differ. No liquid goes on the motherboard. |
| ESD-safe soft brush (optional) | About $6. For dust that air alone will not lift. Never scrub connector contacts with it. |
| Shop compressor | Do not use one. ASUS and Acer both tell you not to. Regulated shop air for workplace cleaning is capped at under 30 psi by OSHA 1910.242(b), and that is an occupational limit, not permission to point a compressor at a motherboard. |
How to Clean Dust From PC
This is the desktop tower sequence. Laptops and all-in-ones diverge at the point where you would open the case, and both get their own section further down.
- Nothing but the machine and thirty seconds
Shut Windows down from the Start menu rather than holding the power button. Once the fans stop, flip the rocker on the back of the power supply to O if it has one, then pull the AC cord out of the wall and out of the machine. Unplug the monitor, keyboard, mouse and anything else hanging off the back. Now press and hold the case power button for fifteen seconds. Nothing will happen visibly, and that is the point: you are draining the charge still sitting on the motherboard so it cannot find a path through you or a component later.
→ Ready for Step 2 when the AC cord is physically out of the machine, every peripheral cable is disconnected, and you have held the power button for a full fifteen seconds.
- A hard, uncarpeted surface with room to work
- An open door or window nearby
Carry the tower somewhere you can work on a hard surface, ideally near an open door or window, because the dust has to go somewhere and you do not want it going back into the machine or into you. A kitchen table beats a bedroom floor. Carpet plus dry winter air is the worst combination for static, so get the machine off the floor before you open it. Give yourself enough clear space to lay the side panel flat where nobody will tread on it.
→ Ready for Step 3 when the tower is on a hard surface, off carpet, with space beside it for the panel.
- Wired ESD wrist strap
Put the strap on so the metal contact sits against skin rather than a sleeve, then clip its lead to bare unpainted metal on the case frame. A screw head or an unpainted chassis edge works; paint and tempered glass do not, because neither conducts. Leave it on for the whole job rather than clipping it on and off. If you have no strap, touch bare metal on the case every couple of minutes, but understand that is a weaker habit than a continuous connection.
→ Ready for Step 4 when the strap is snug against your wrist and its clip is biting bare metal, not paint.
- #2 Phillips screwdriver, if the panel is screwed rather than latched
- Your phone
Look at the rear edge of the case and undo only the fasteners holding the panel you want off. Some are captive thumbscrews, some are tool-less latches, some are ordinary screws. The panel usually slides back an inch before it lifts away, so slide before you pull. If it will not move with light pressure, stop and look again for a screw you missed rather than forcing it. With the side off, take two or three photos of the inside on your phone. You will want them at reassembly when a cable is not where you remember it being.
→ Ready for Step 5 when the panel is off and set somewhere it cannot get stepped on, and you have photos of the cable routing.
- Duster, or a sink if the filter is washable mesh
Filters are where most of the dust actually is, so they come first. Do not assume yours is on the front. Trace each intake fan outward toward the case wall and look for a removable mesh tray sitting just upstream of it, most towers have one at the front, many have one under the power supply, and some have a top or side tray as well. Slide each one out. If it is a rigid mesh or nylon tray, rinse it under the tap and set it aside to dry. If it is foam, paper, or glued to a panel, keep it dry and just blow it out. When in doubt, do not wet it.
→ Ready for Step 6 when every filter is out of the machine and either rinsed and drying or blown clean, and you can see daylight through the mesh when you hold it up.
- Canned or electric duster
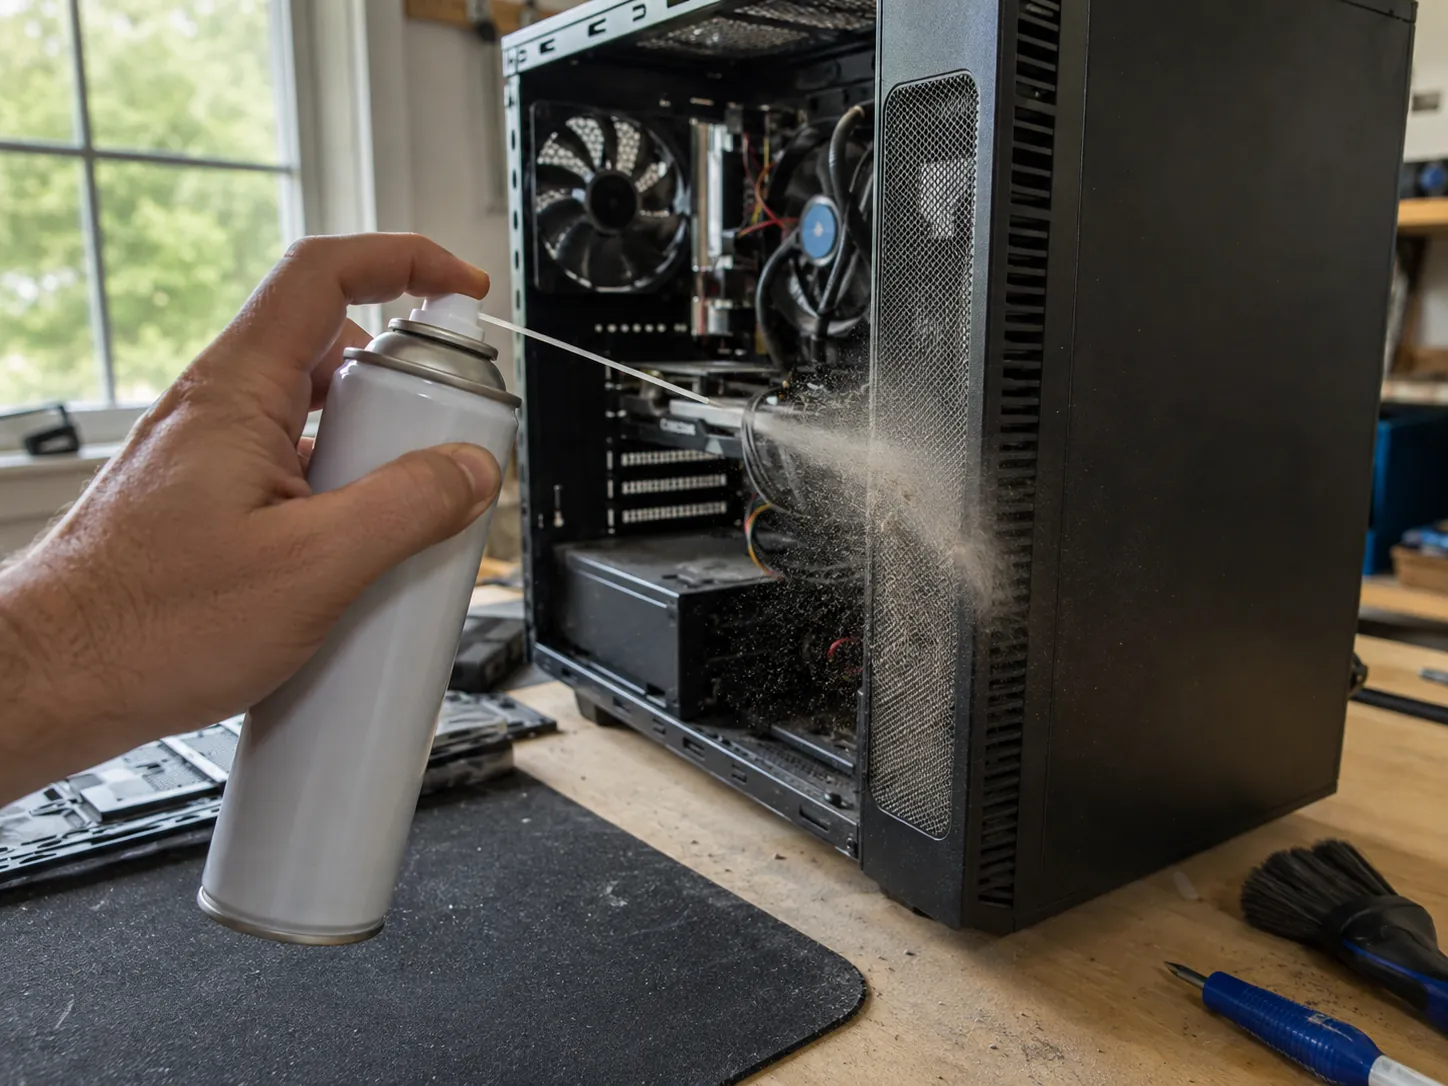
Give the dust somewhere to go before you start moving it. Aim from inside the case outward through the front grille, so dust leaves the machine instead of relocating deeper into it. Hold the can upright, three to four inches back, and work in two to three second bursts. Do not shake the can and do not tilt it past about forty degrees, or it will spit liquid propellant instead of gas, and that liquid is cold enough to be a problem on a circuit board. Short bursts also stop the can frosting over and losing pressure.
→ Ready for Step 7 when a burst through the front grille no longer sends a visible puff of dust out the other side.
- Duster
- A fingertip, or a cotton swab for fans you cannot reach
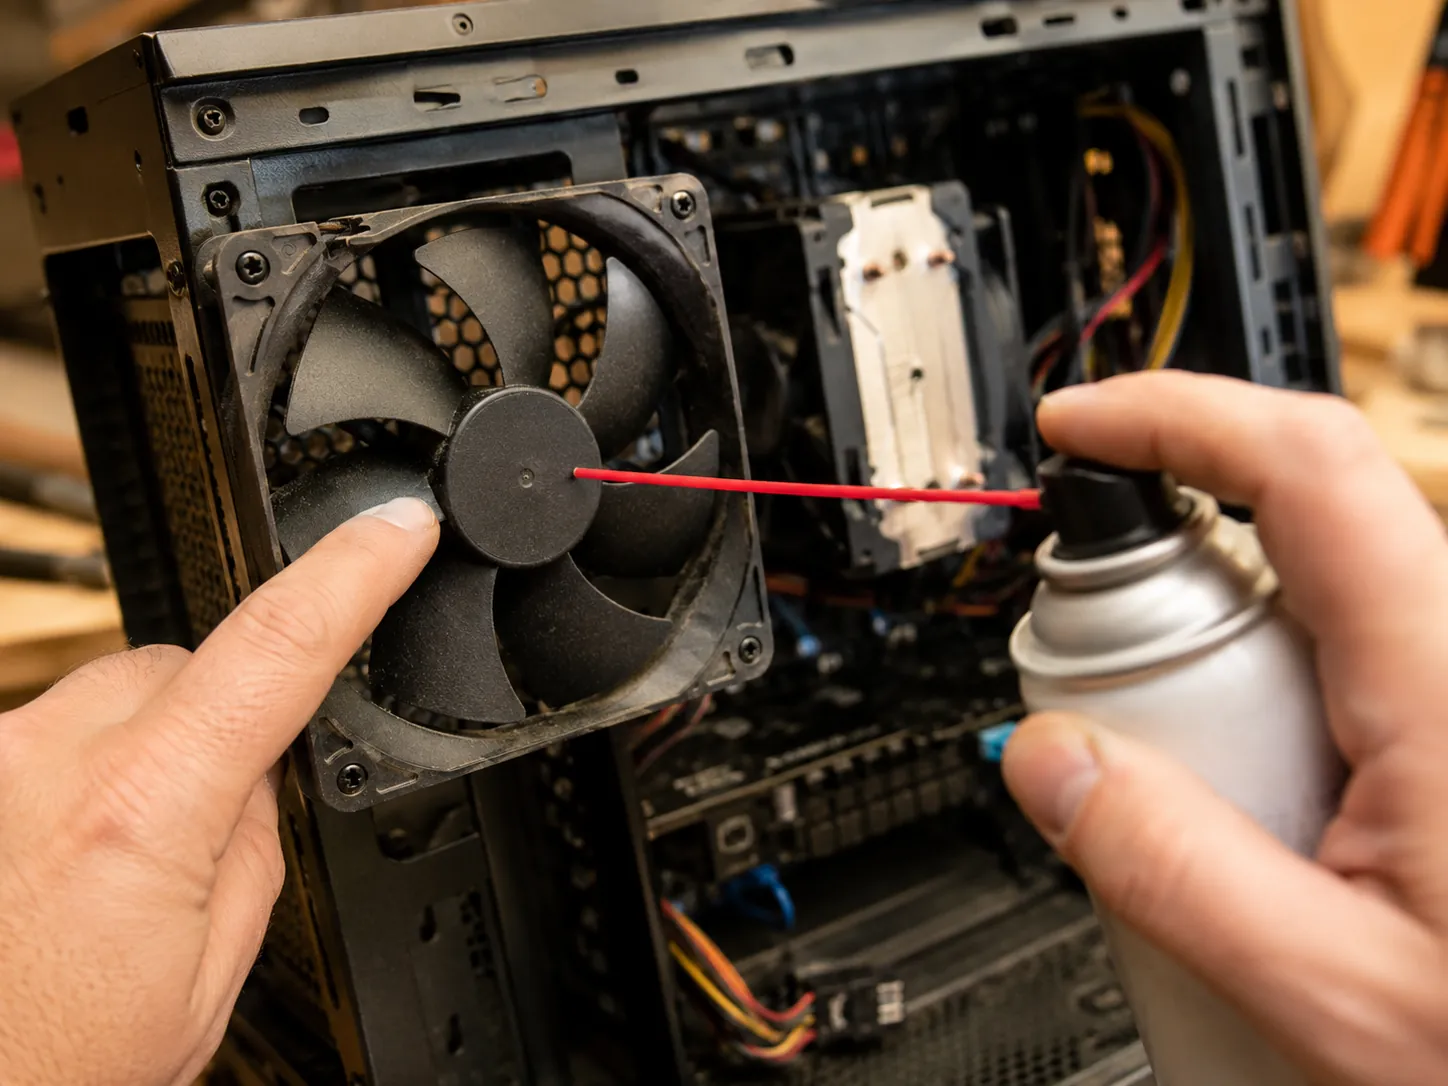
This is the step people get wrong. A fan spun by an air jet turns far faster than its motor would ever drive it, and Noctua warns that letting it free-spin can damage the bearing and the hardware it is connected to. So before the air arrives, hold the blades still. Press one fingertip gently against a blade to stop the rotor, then clean around it in short bursts, working the dust out through the nearest grille rather than into the case. Do every reachable fan: front intake, rear exhaust, top, and any side fan. Release, move to the next, pin it, then clean.
→ Ready for Step 8 when every accessible fan has been cleaned with its blades held, and none of them spun freely while you worked.
- Duster
- ESD-safe soft brush, if the dust has matted
The cooler on top of your processor is a stack of thin metal fins with a fan bolted to it, and dust bridges the gap between those fins where you cannot see it. Pin the cooler fan the same way you pinned the others, then aim along the fin channels rather than at the face of the stack, so air travels the way the cooling air normally travels. Come at it from both sides if you can reach. Leave the heatsink bolted to the processor. Taking it off means cleaning and reapplying thermal paste, which turns a twenty-minute clean into a different job entirely.
→ Ready for Step 9 when you can see gaps of light between the fins along the length of the stack instead of a grey mat across them.
- Duster
Leave the card in its slot. Pin each of its fans in turn, most cards have two or three, and they are small enough to spin dangerously fast under an air jet, then blow through the shroud openings and along the exposed fin edges. Much of the fin stack hides under the plastic shroud, so you will not clear all of it without stripping the card down, and for a routine clean that is fine. If the card is visibly packed solid under the shroud after this, that is the point to bring it in rather than start removing screws.
→ Ready for Step 10 when the visible fin edges and the fan openings are clear and the fans still turn freely by hand.
- Duster
Sweep the open board surfaces and the area around the memory sticks with the same short bursts, keeping the straw a few inches off and never poking it into a socket. Leave the memory installed. There is no cleaning reason to pull it, and a module knocked half out of its slot is the single most common cause of a machine that will not start after a clean. Keep the brush away from the small components soldered to the board; they are easier to knock off than they look. No liquid touches anything in here.
→ Ready for Step 11 when the board surfaces look matt black again rather than furred, and every memory stick is still seated with its clips closed.
- Duster
Blow dust off the outside of the power supply housing and out through its rear grille. That is the whole job. Do not remove its cover and do not push a straw through the grille to reach the fan inside. You cannot pin that fan without opening the enclosure, and opening the enclosure is the one thing on this page that can genuinely kill you, because the capacitors inside hold high voltage after the unit is unplugged. Blow gently from the outside, accept that you will not get all of it, and if the unit is visibly choked, that is a replacement or a bench job.
→ Ready for Step 12 when the outer housing and rear grille are clear and the cover has stayed on.
- Reusable hook-and-loop ties, if you have them
Before the panel goes back on, look at every fan and check nothing can reach its blades. Move loose cable runs behind the tray or tie them back, and keep bundles clear of the intake and exhaust paths, since Noctua notes that tidy routing reduces obstruction and turbulence. Do not cinch them so tight that connectors are under strain. Then spin each fan a full turn by hand and watch for anything catching. Ten seconds here saves the tick-tick-tick that otherwise has you opening the case again tomorrow.
→ Ready for Step 13 when every fan turns a full revolution by hand without touching a cable.
- The filters you rinsed in Step 4
- #2 Phillips screwdriver, if the panel is screwed
Check every rinsed filter before it goes anywhere near the machine. It needs to be dry through, not just dry on the surface. Press it against the back of your hand and look at the frame edges and corners, where water sits longest. If there is any doubt at all, leave it overnight and put the panel on without it. A damp filter sitting in an intake path is moisture inches from powered electronics. Once the filters are in, slide the side panel back along its rails, refit its fasteners, and snug them without leaning on the driver.
→ Ready for Step 14 when every filter is bone dry and back in its tray, and the panel sits flush with no cable trapped along its edge.
- Two microfiber cloths
- 70% isopropyl alcohol
Dry microfiber first, over the case, keyboard and mouse. For marks that will not lift, dampen the second cloth with 70 percent isopropyl, dampen the cloth, never the device, and never spray into a port or a seam. ASUS and Dell both specify 70 to 75 percent for supported exterior surfaces. Treat the monitor as a different material, because screen coatings are not case plastic. Start with a barely damp cloth and water and check your display maker's guidance before putting alcohol anywhere near it. Let everything air-dry completely before power goes back on.
→ Ready for Step 15 when the surfaces are clean and completely dry to the touch, with no damp film left on any panel or key.
- The power cable and your basic peripherals
Reconnect the monitor, keyboard and mouse and nothing else yet, put the power supply rocker back to I, plug the cord in and start the machine. Watch and listen for the first ten seconds with the panel still off if you can: every fan you cleaned should spin up, and nothing should tick, rattle or scrape. Then let it sit at the desktop for a few minutes and put it under some real load, a game, a video export, whatever it normally does, and listen again. Fans ramping and settling is normal. Fans ramping and staying loud, or a machine that shuts itself down, means stop and read the next section.
→ Ready to close up when every fan is turning, the machine reaches the desktop normally, and it sounds the same as it did before you started or quieter.
PC Cleaning Troubleshooting: What to Check When It Goes Wrong
The most common complaint after a first cleaning is that the machine got louder, and the cause is almost always mechanical rather than thermal: something is now touching a fan. Reassembly moves cables, and a wire resting in a blade path makes a rhythmic tick or scrape that starts the instant the fan spins and changes pitch as the fan ramps. Shut down, unplug, hold the power button for fifteen seconds, and check every fan sweep for a cable or a filter edge that has drifted into it. Spinning each fan by hand through a full revolution finds it in seconds. A steady whoosh that is just louder than you remember is a different thing, clean fans move more air, and a machine that was quiet because it was suffocating is not a machine you want back.
A machine that will not start at all after a clean is nearly always something disturbed rather than something broken, and memory is the usual suspect. Open it back up, press each memory stick down until both clips click home, and check that the fat power connectors on the motherboard and the graphics card are fully seated, because they can look connected while sitting a millimetre proud. Check the power supply rocker is back to I. Work one change at a time and try again between changes, so you know what fixed it. If it still will not post, the fault-isolation route is the same one manufacturers publish: strip back to one memory stick, no extra drives, no expansion cards beyond the graphics you need for display.
Temperatures that did not improve are the honest disappointment, and the reason is usually that dust was never the bottleneck. If the fin stack is clear and the fans all turn, the remaining candidates are a cooler that has lost proper contact with the processor, thermal paste that has dried past its useful life, a case that was never moving enough air in the first place, or a fan installed backwards so two of them fight each other. That last one is worth checking with a strip of tissue held at the rear grille to see which way air is actually moving. We wrote about the paste question separately in how long thermal paste actually lasts, and about what cleaning realistically does and does not fix in does cleaning a PC improve performance. One thing we will not give you is a target temperature, because there is no honest universal number: Intel puts its processors' maximum junction temperature somewhere around 100 to 110°C depending on the model, and AMD's varies by chip, so "under 80 is fine" is advice that means nothing without knowing what you own.
How to Clean Computer Types That Are Not a Desktop Tower
| Machine | What changes |
|---|---|
| Desktop tower | Nothing. The sequence above is written for this. |
| Laptop, serviceable bottom cover | No power supply rocker. Shut down, unplug the charger, remove the battery if it comes out, and disconnect the internal battery before touching a fan. Same cleaning principles, smaller scale. |
| Laptop, sealed | Exterior only. Vents from the outside, keyboard, case. Do not pry the bottom cover on a generic instruction. |
| All-in-one | Its own branch. Getting inside can mean removing the stand, releasing a back cover on specific tabs, then an I/O cover. Treat as exterior-and-vents unless you have that model's service manual open. |
Everything above assumes a desktop tower with a side panel. The cleaning principles carry over to a laptop, but the access does not, and that is where people get into trouble. A laptop has no power supply rocker: shut it down, pull the charger, and remove the battery if yours comes out. If the machine has a serviceable bottom cover and you are comfortable in there, the fan and heatsink work is the same job at a smaller scale, with the internal battery disconnected first. If it is sealed, or you are not sure, stop at the outside, blow the vents out from the outside, brush the keyboard, wipe the exterior, and leave it there. Generic "pry off the bottom cover" instructions are how screens get cracked and ribbon cables get torn, because clip positions and hidden screws genuinely vary by model.
All-in-ones are their own branch and should not inherit tower instructions at all. Getting inside one can mean removing the stand, releasing a back cover along specific tabs, and sometimes pulling an I/O cover and a board shield before you reach anything worth cleaning. Unless you have that machine's own service manual open in front of you, treat an all-in-one as an exterior-and-vents job.
How often should you clean a PC?
How often you clean a PC depends on the room it lives in more than the calendar. Twice a year suits most machines in most homes. Push it to every three or four months if you have shedding pets, if the tower sits on carpet, if anyone smokes indoors, or if the machine runs hard every day. Stretch it to once a year if it lives on a desk in a clean, dry room and does light work. The honest test is not the calendar: pull the front filter and look. If it has gone grey and you cannot see daylight through the mesh, you are due, whatever the calendar says. Keeping the tower off the floor does more for dust than any cleaning schedule, since carpet-level air is where most of it comes from.
Now that you know how to clean your PC, if you would rather have someone do it properly, our PC cleaning service covers exactly this routine on a bench with the right tools, and you can call the shop on (608) 214-5158.
The two safety rules that matter when you clean your own PC
Frequently Asked Questions About Cleaning a PC
Can I use a vacuum cleaner to clean my PC?
Not inside the case. Noctua warns that vacuum suction puts excessive force on fan blades, and a household vacuum can generate static right next to components that static kills. A small vacuum used gently on external vents and I/O openings is a different matter and some manufacturers permit it. Use one for the dust you blow out onto the floor, not for the dust inside the machine. We went into the detail in why you should never vacuum a PC.
Can I wash my PC dust filters?
Rigid mesh and nylon trays, yes, rinse them under the tap and let them dry completely before they go back. Foam, paper, and anything glued to a panel should stay dry and just get blown out. The rule that keeps you out of trouble is that a filter must be dry through, not dry on the surface, before it goes near a powered machine. If you are not certain which type yours is, run the machine with the filter out overnight rather than putting a damp one back.
What percentage isopropyl alcohol should I use on a computer?
70 to 75 percent for supported exterior surfaces, which is what ASUS and Dell both specify. Higher concentration is not automatically safer, because the risk is the surface and the coating rather than the water content. Screens have their own rules and often want water first. Inside the case, for a routine dust clean, you do not need alcohol at all.
How do I clean a laptop fan without opening the laptop?
Short bursts through the exhaust vent from the outside, can upright and a few inches back, with the machine off and the charger unplugged. You will shift loose dust but not a matted fan, because you cannot pin the blades from outside and you should not spin them freely. If temperatures are still high after that, the fan needs to come apart, which on most laptops means a service visit rather than a kitchen-table job.
How do I clean PC fans without damaging them?
Hold the blades still before the air reaches them, every time. That single habit is the difference between a clean fan and a fan you have quietly worn out, because an air jet drives a rotor far past the speed its motor would. A fingertip is enough on a case fan; use a cotton swab for the small ones on a graphics card. Clean around the pinned blade in short bursts, then release it and move to the next.
Do I need to clean the software side too?
That is a separate job with a separate payoff. Dust fixes heat; it does nothing for a full drive or a machine loaded with programs launching at startup. If the complaint is slowness rather than noise or heat, start with the free software steps for a slow computer instead, and be sceptical of anything that calls itself a one-click cleaner, we looked at those in are PC cleaner apps safe.